
Making a Request
- Log in to your account and select Time off from the left-side menu.
- If you don’t have any time off requests, this page will be empty. To add a new time off request select the [+ New Request] button at the top of the page.
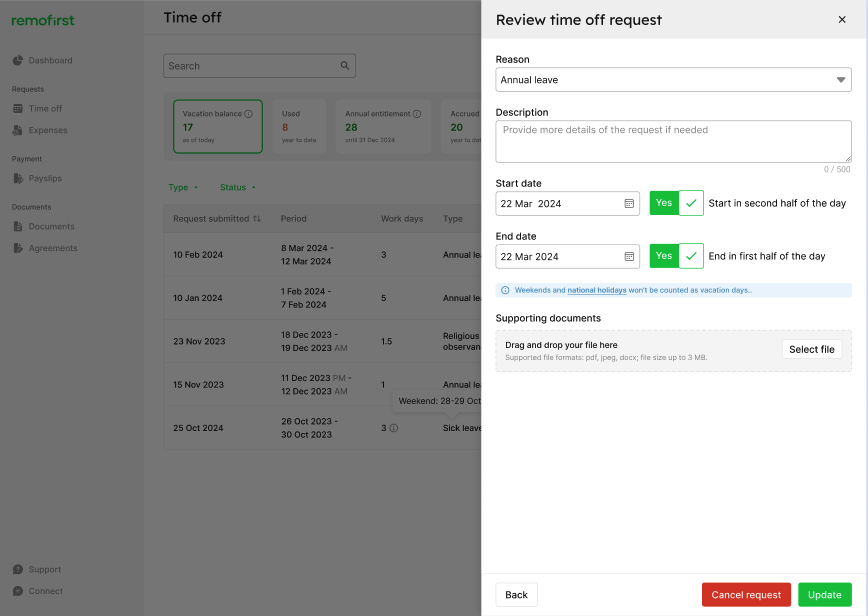
Step 1. Specify the dates
- Please specify Start and End date
- If you will take time off starting from the second half of the day, please select Start from second half of the day. That means that only 0.5 days will be added instead of 1 day.
- If you need to take only half a day on the last day of your time off, please select End in first half of the day. That means that only 0.5 days will be added instead of 1 day.
Total time off is calculated without including weekends or national holidays of your country of residence.
Step 2. Choose a Reason for your time off request
There are multiple Reasons:
- Vacation, Sick leave, Parental leave, Caregiver leave, Educational leave, Marriage leave, Military training assembly, Military medical examination, Military leave, Sabbatical, Civic Duties, Religious observance, Bereavement.
Step 3. Provide a description and supporting documents (if required).
- You can leave a description for the time off request that you are creating (this step is optional). You can also attach a proof document for time offs, such as a doctor's note. This step is optional, but may be required by your employer.
Step 4. Click Submit to formally request time off via the Remofirst Platform.
Click on the "National Holidays" link in the blue box in the Request Time Off window to view a list of all national holidays in your country.

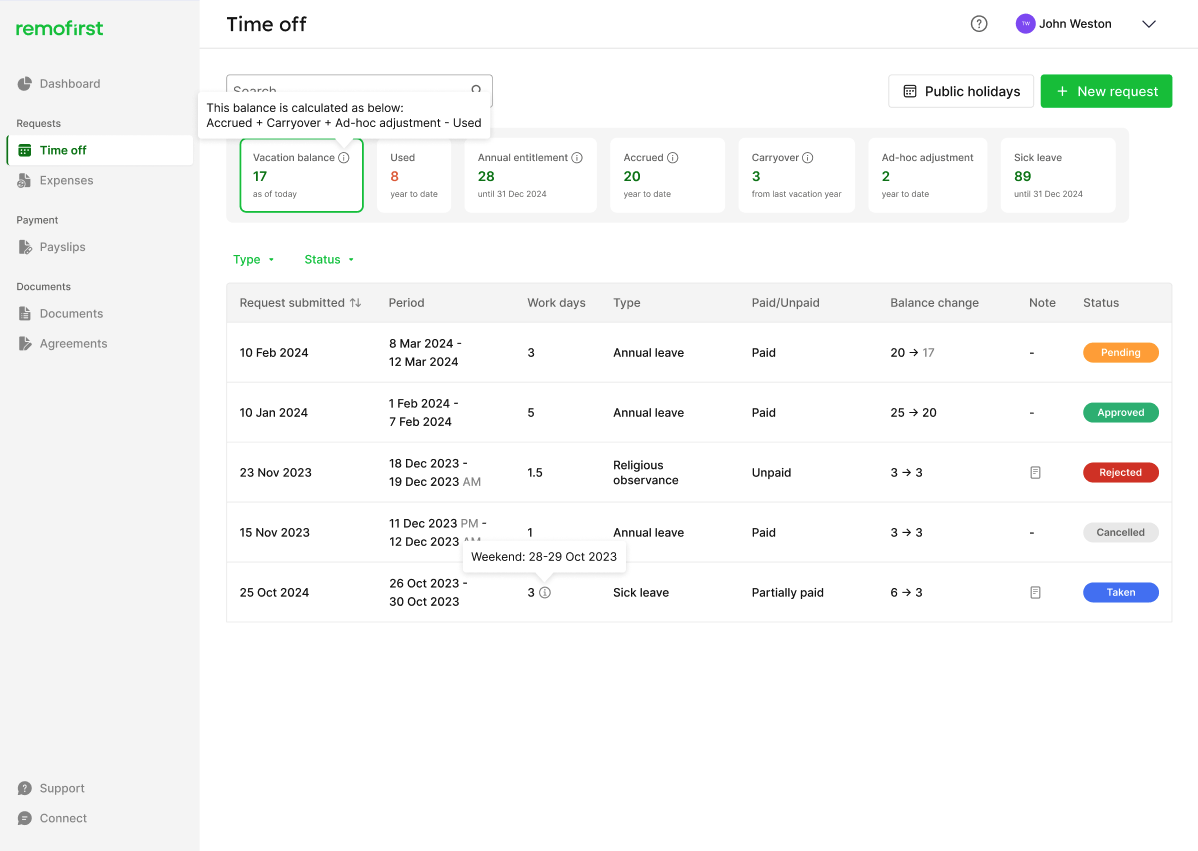
Viewing your Requests
A new time off request will be added into the Time Off tab.
Once a request is created, its status will be set to pending in our platform. While the status is pending, you can edit and/or cancel this request.
- To edit, click on a request, make your changes, and then click the green "Update" button to confirm.
- To cancel the request, click on the red "Cancel request" button. You can also cancel approved time off requests if they have not yet been taken.
3. Once your request has been finalised and submitted, please wait for approval from your employer.
- Once your request has been approved or rejected, your request's status will change to "Approved".
- If your request is not accepted, then its status will change to "Rejected". Cancelled requests will have the status "Cancelled".
- Time offs that have been completed will have the status "Taken" - this status change will happen automatically the day after the requested leave period has passed.
Please note: all time off requests are "Paid" by default. Our local teams will review each request to see if they are compliant with local labour regulations. If a time off request is made that is flagged as needing to be unpaid, our local teams will indicate this in our platform and your employer will be informed. Your employer will then be able to confirm the unpaid time off request, or cancel the request.
Your employer is able to create a time-off request on your behalf. If they do this, you will receive an email notification and you will have to log into the Remofirst platform to approve this request. The request will remain "pending" until it has been approved.
Comments
0 comments
Please sign in to leave a comment.