Payroll approval process (overview)
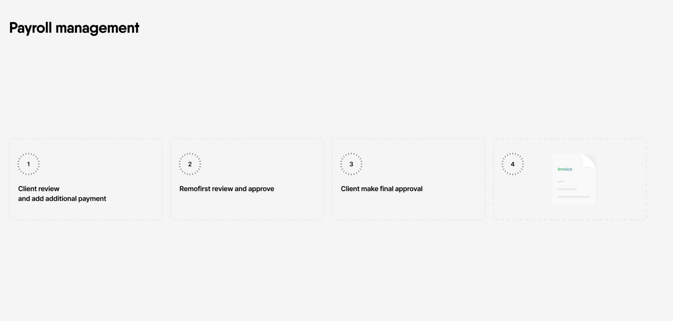
Let's take a look at the diagram. The process of payroll management consists of 4 steps:
- Client Review and additional payment addition
- Remofirst review and approve
- Client makes final approval
- An invoice is created
Step 1. You as a Client review the payroll and add additional payments if needed.
All expense approvals and payroll revisions should be completed by the 3rd working day of the month.
We will add 2 more days for you to review and adjust the payroll if these dates occur on the weekends.
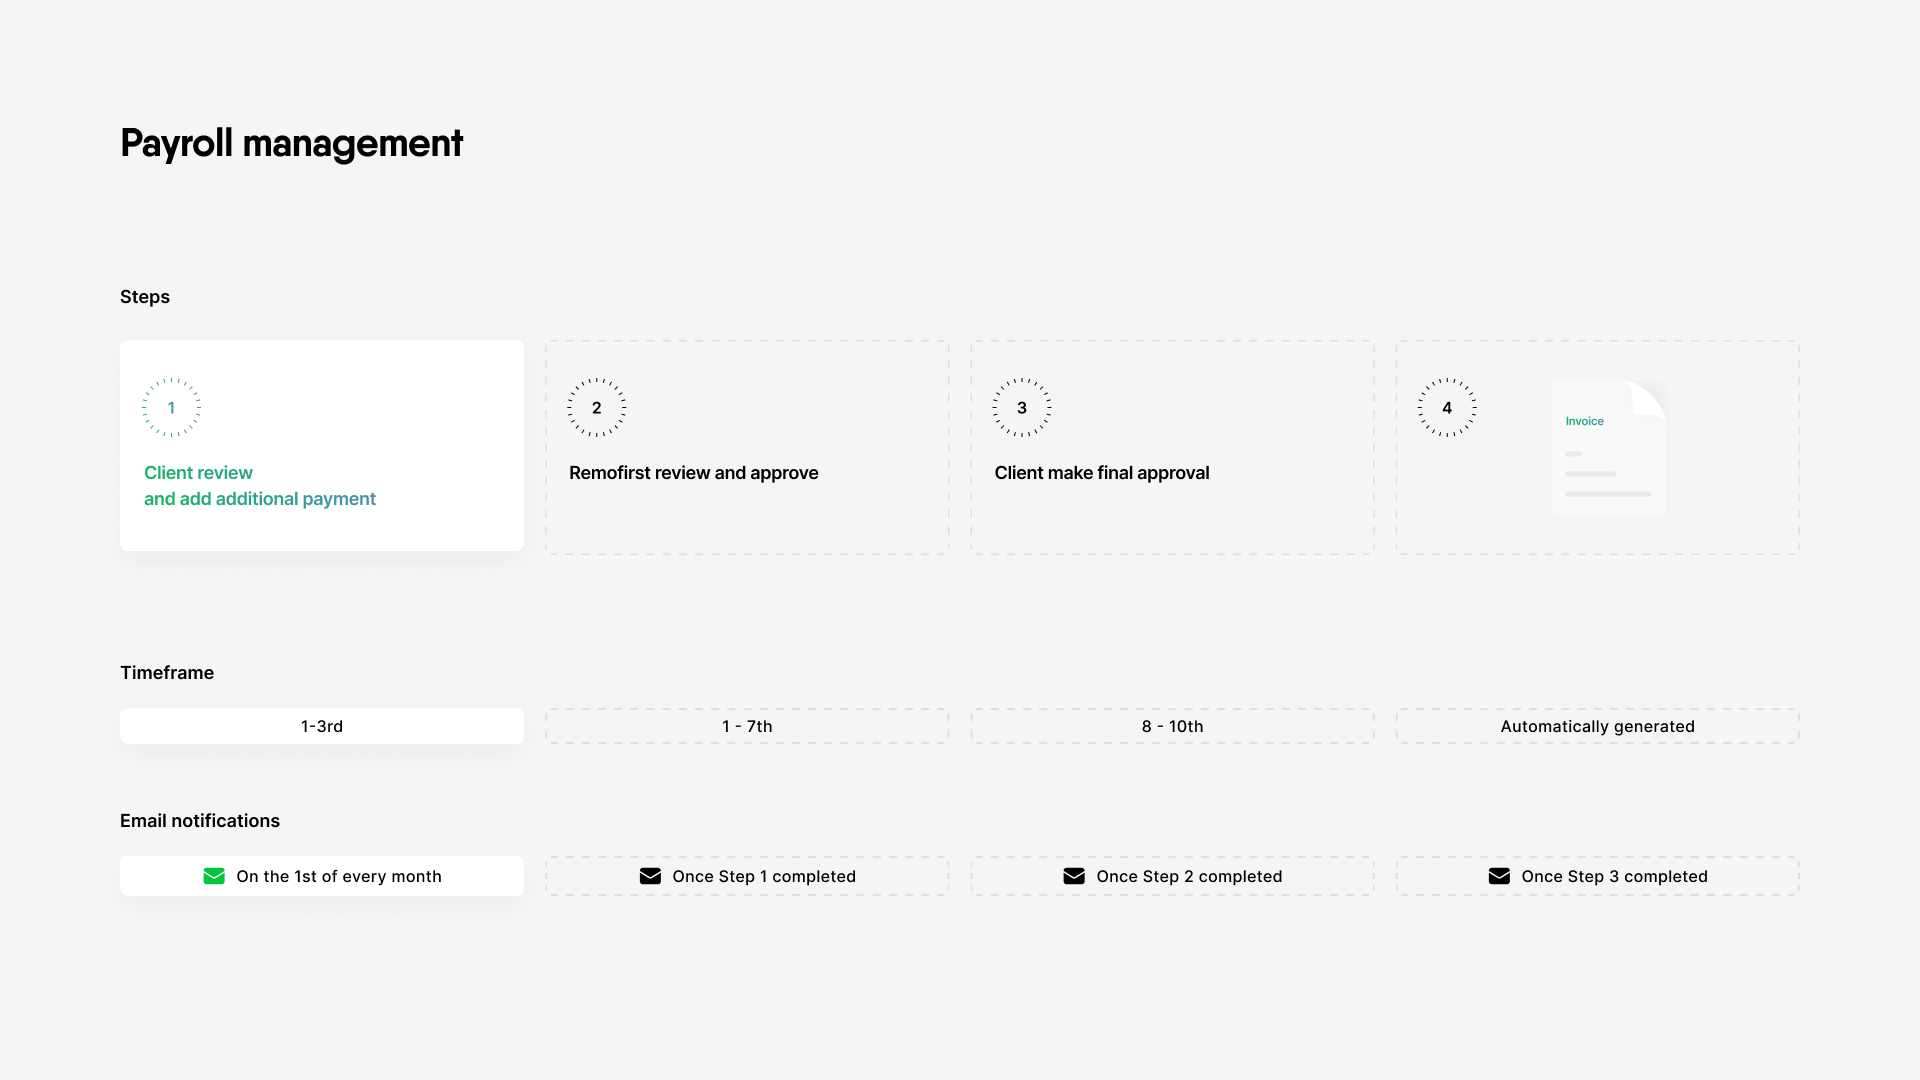
Step 2. Remofirst reviews and approves the payroll.
The timeline for the approval is from the 1st till the 7th day of the month.
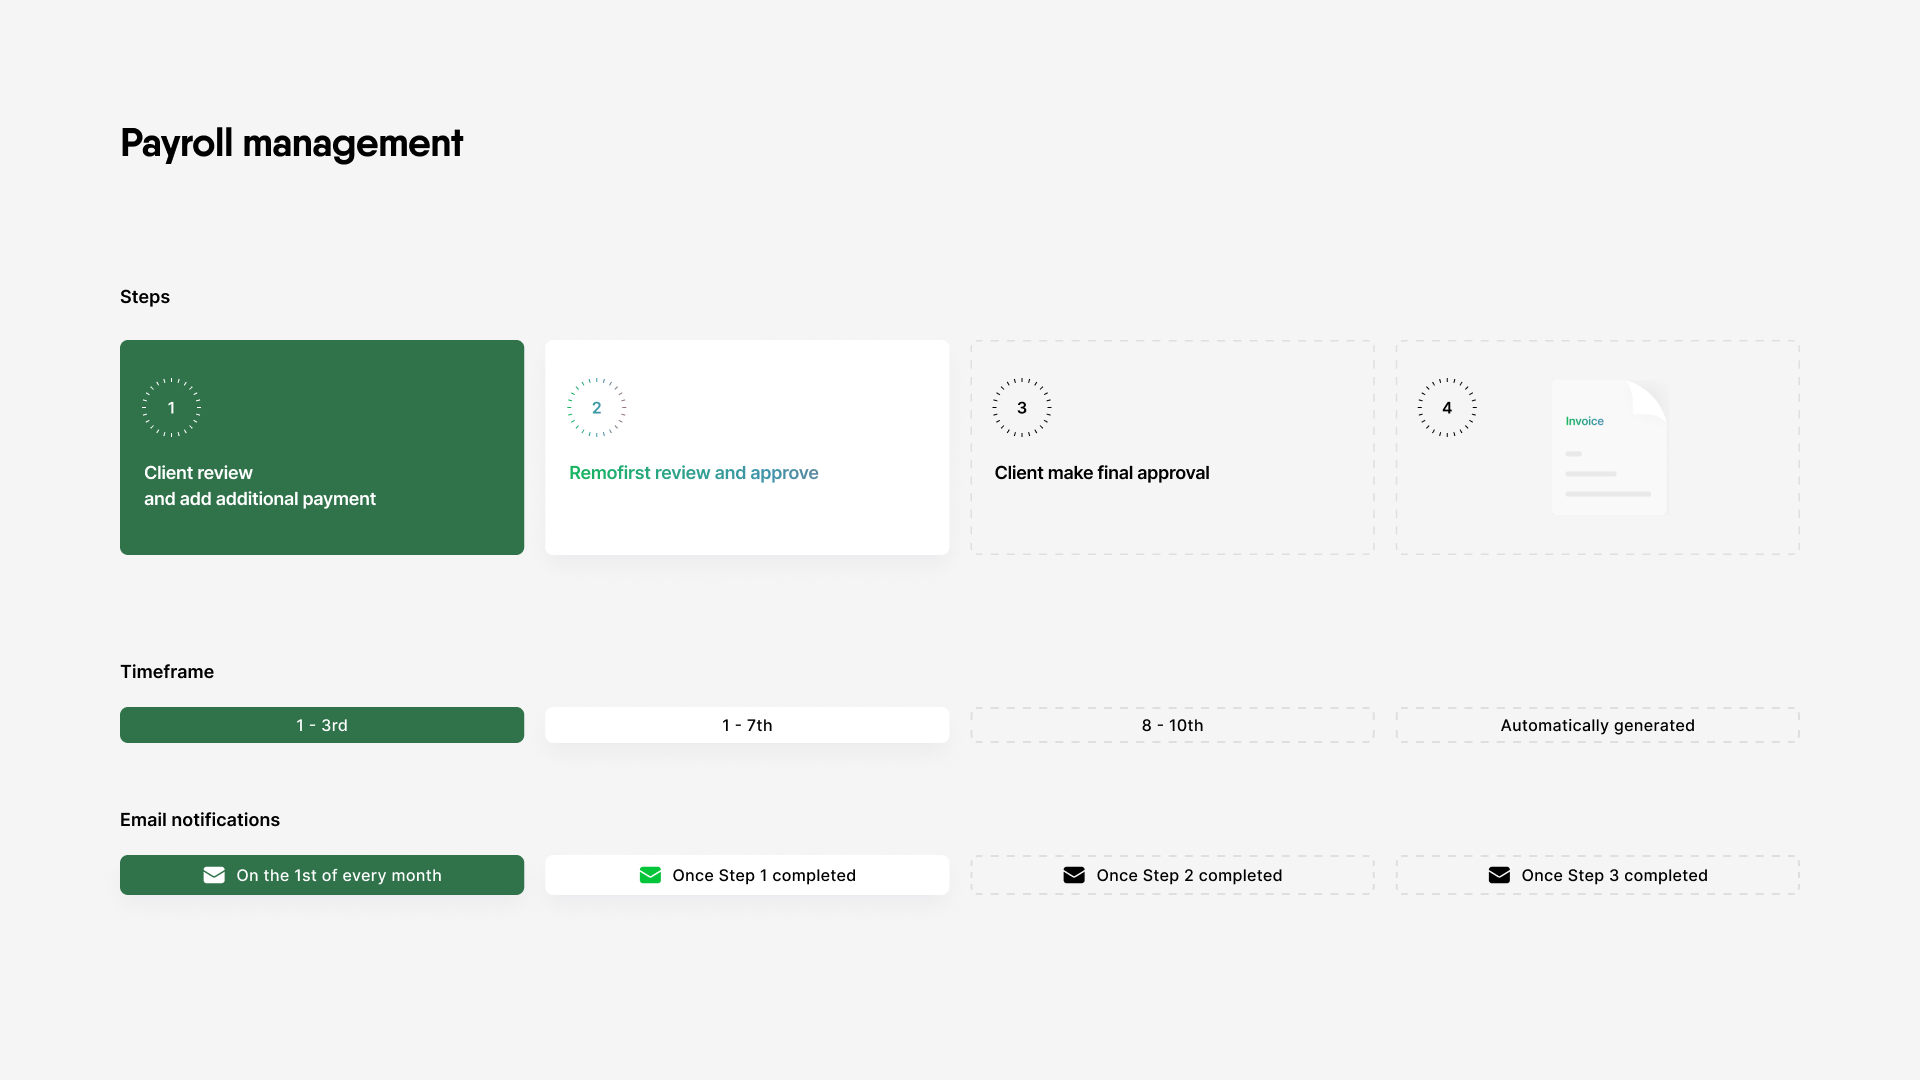
Step 3. Once Remofirst updates the payroll, it will be sent to you for approval on the 8-10th day of the month. Then it would be vital for us to receive your approval within the next 2 business days. Otherwise, it will be approved by default to avoid delays with payments.
Please make sure your accounting team is on the platform so they can see the invoice immediately
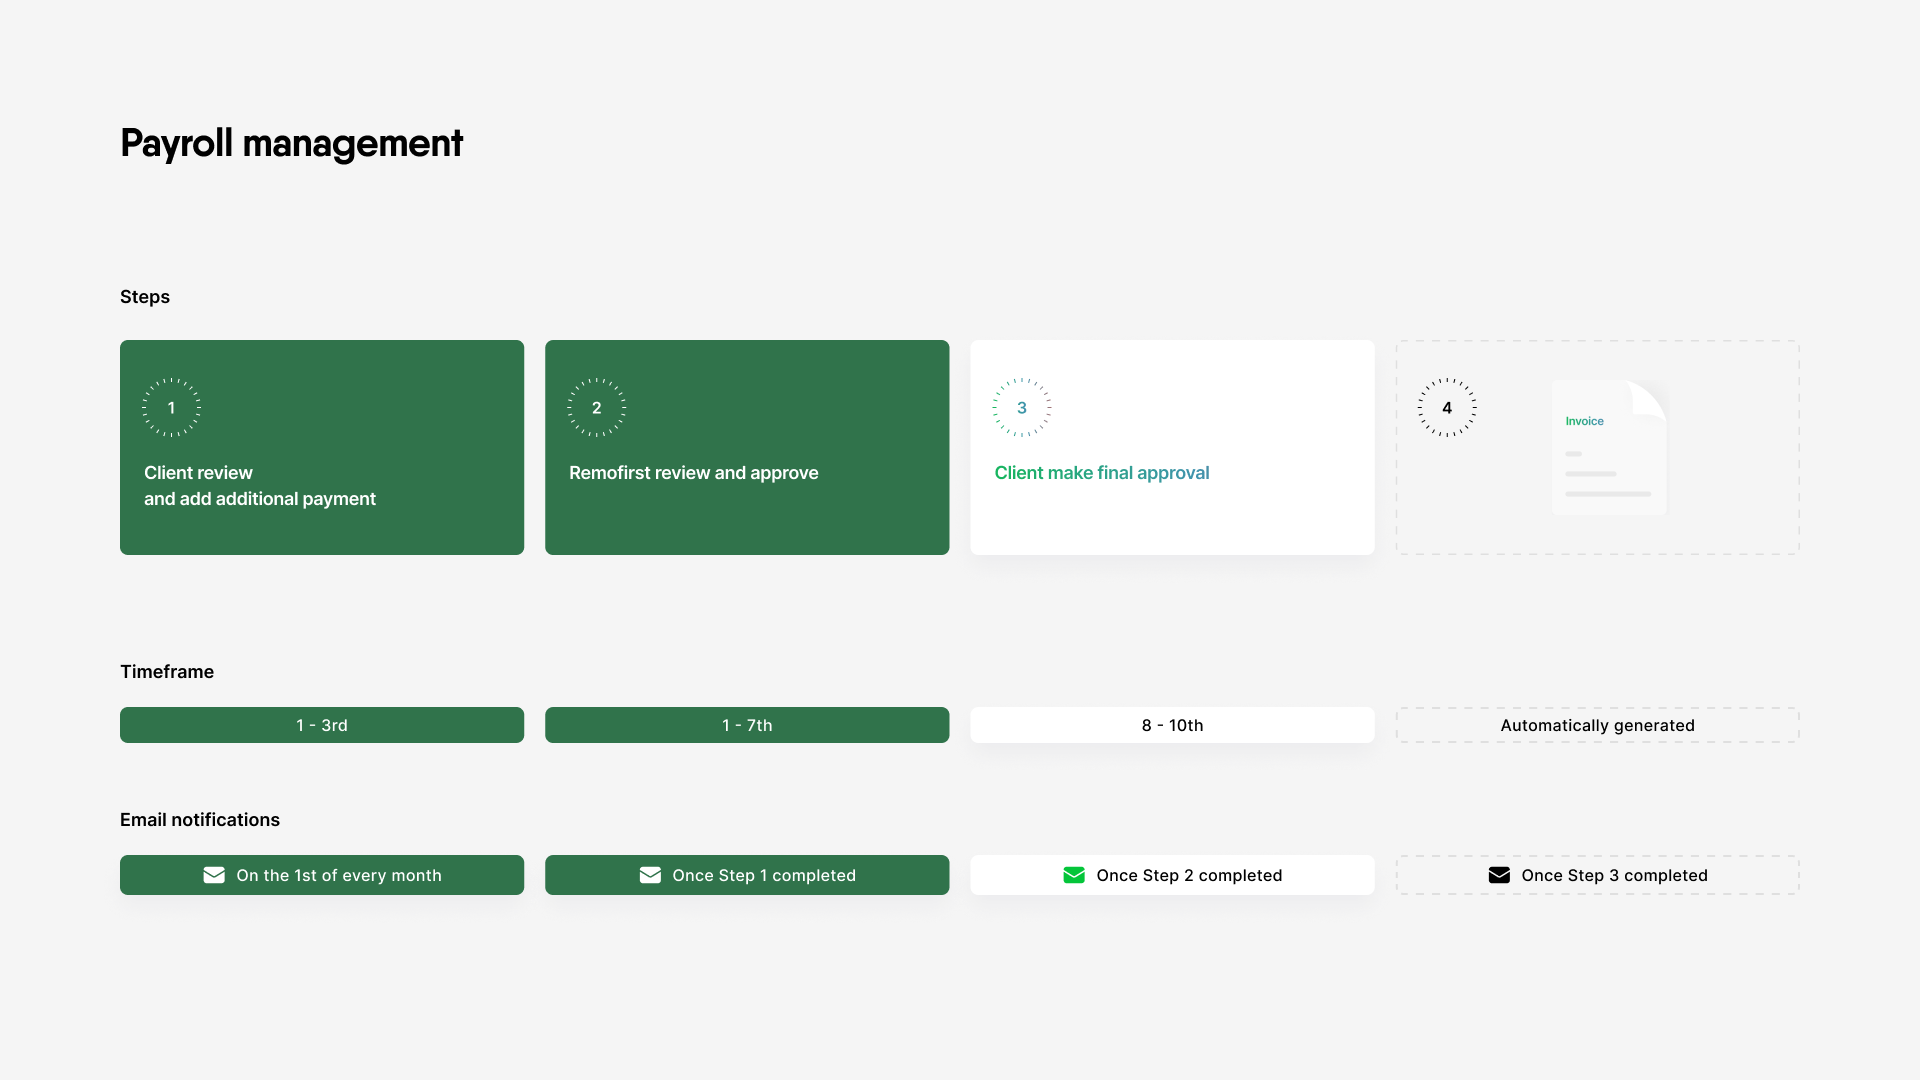
Step 4. After that, an invoice will be generated automatically on the platform. You will receive an email notification about invoice generation.
Now let’s take a closer look at what this will look like for you as a Client on the platform.
Payroll approval (platform guide)
- Once Remofirst approves the payroll, you will receive an email asking you to review and approve the payroll. You can access the page by selecting the Review payrolls button on the email.
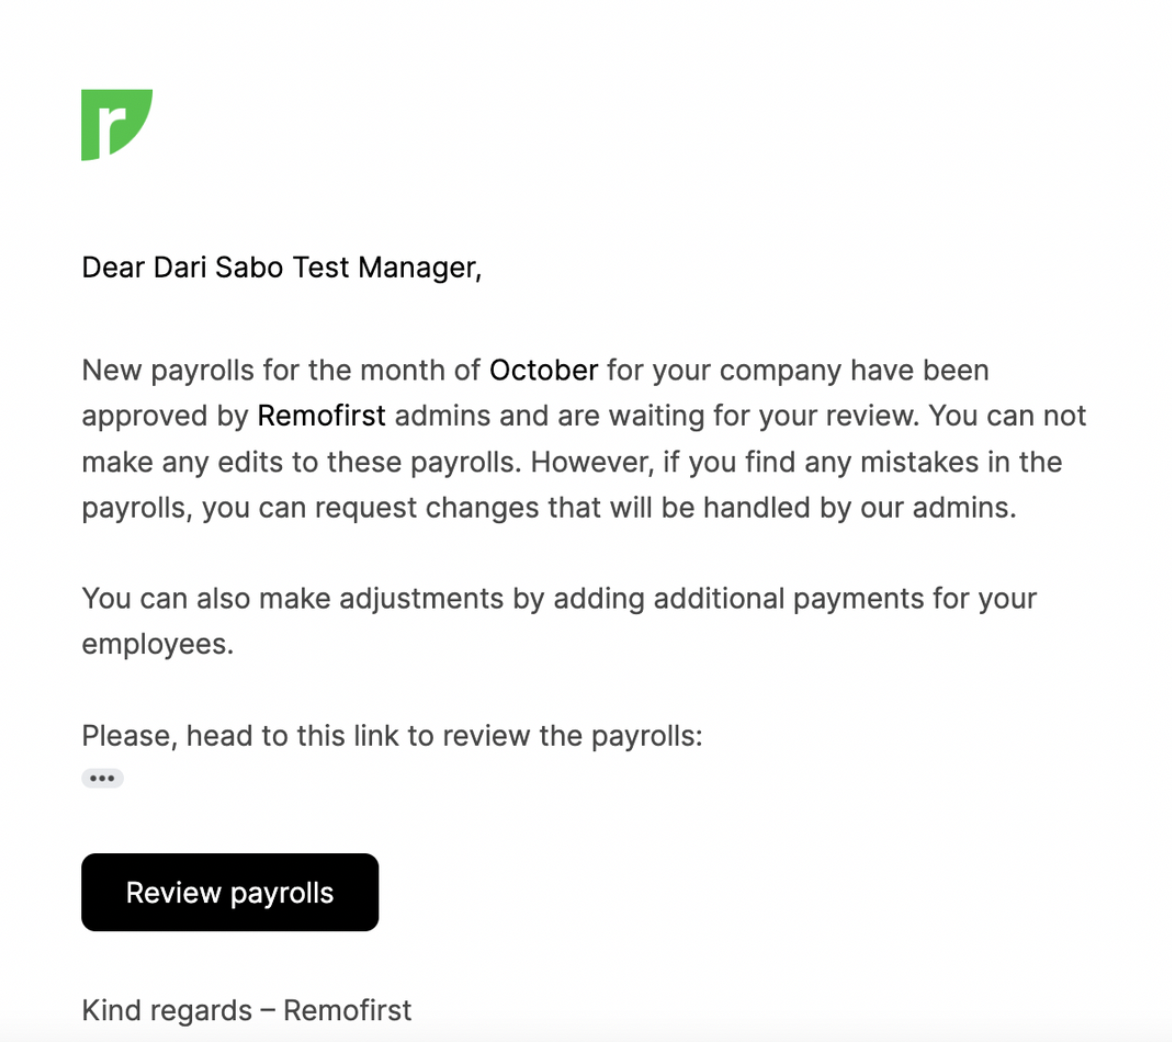
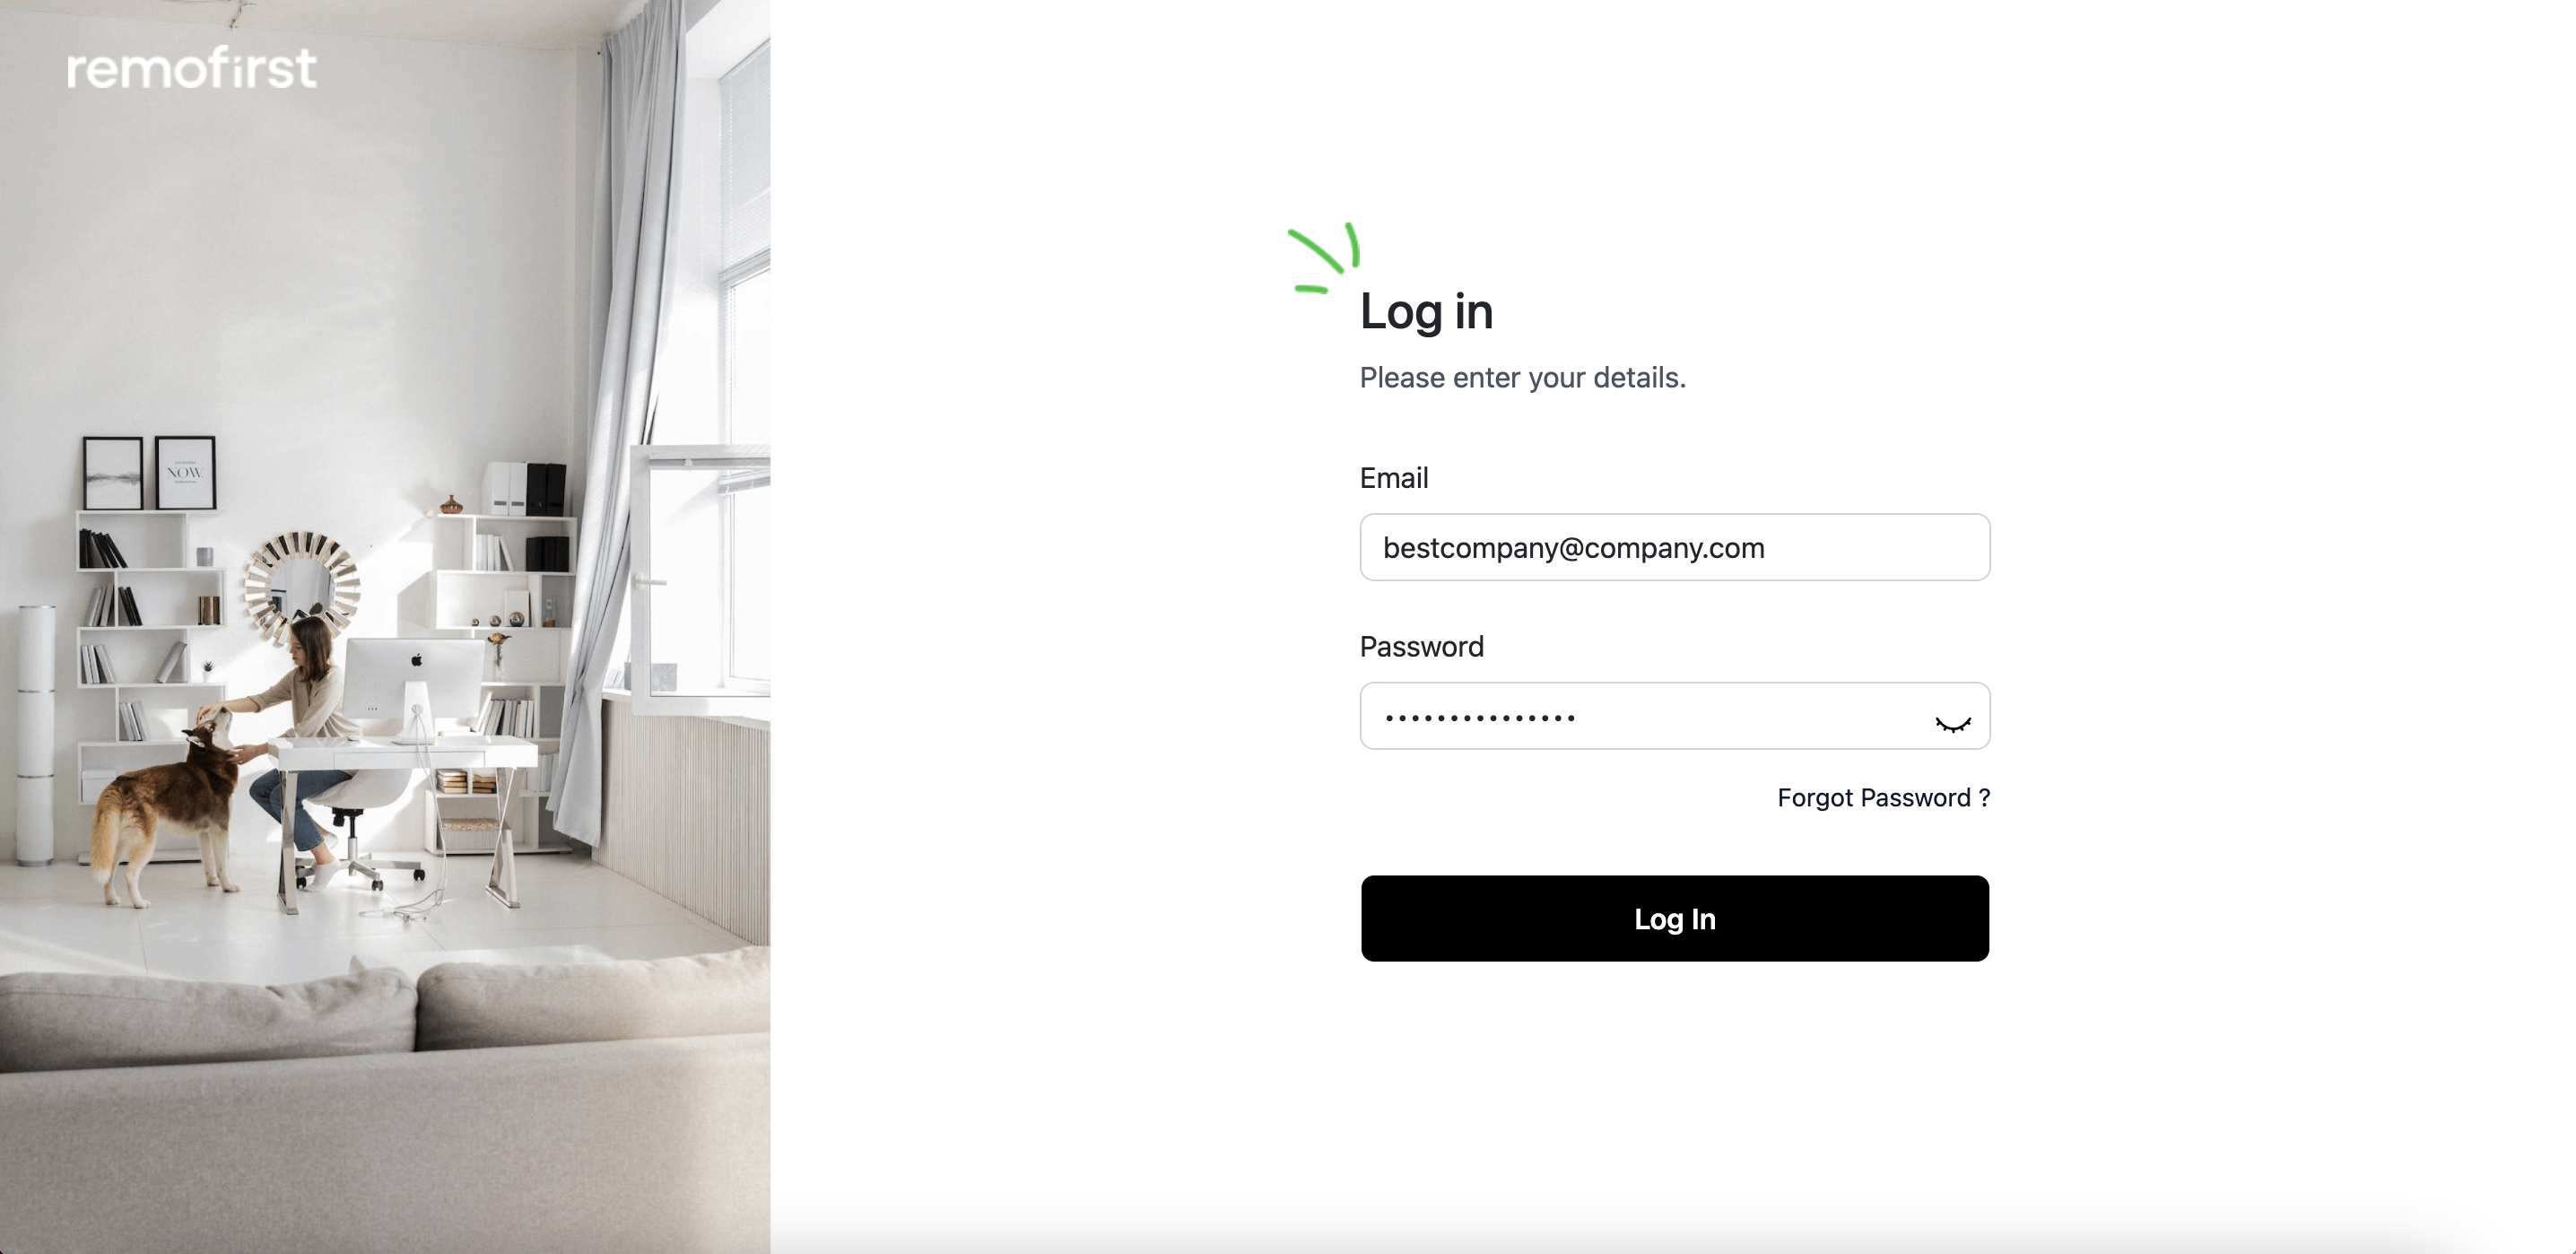
You can also log in to your account using your credentials by heading to this link.
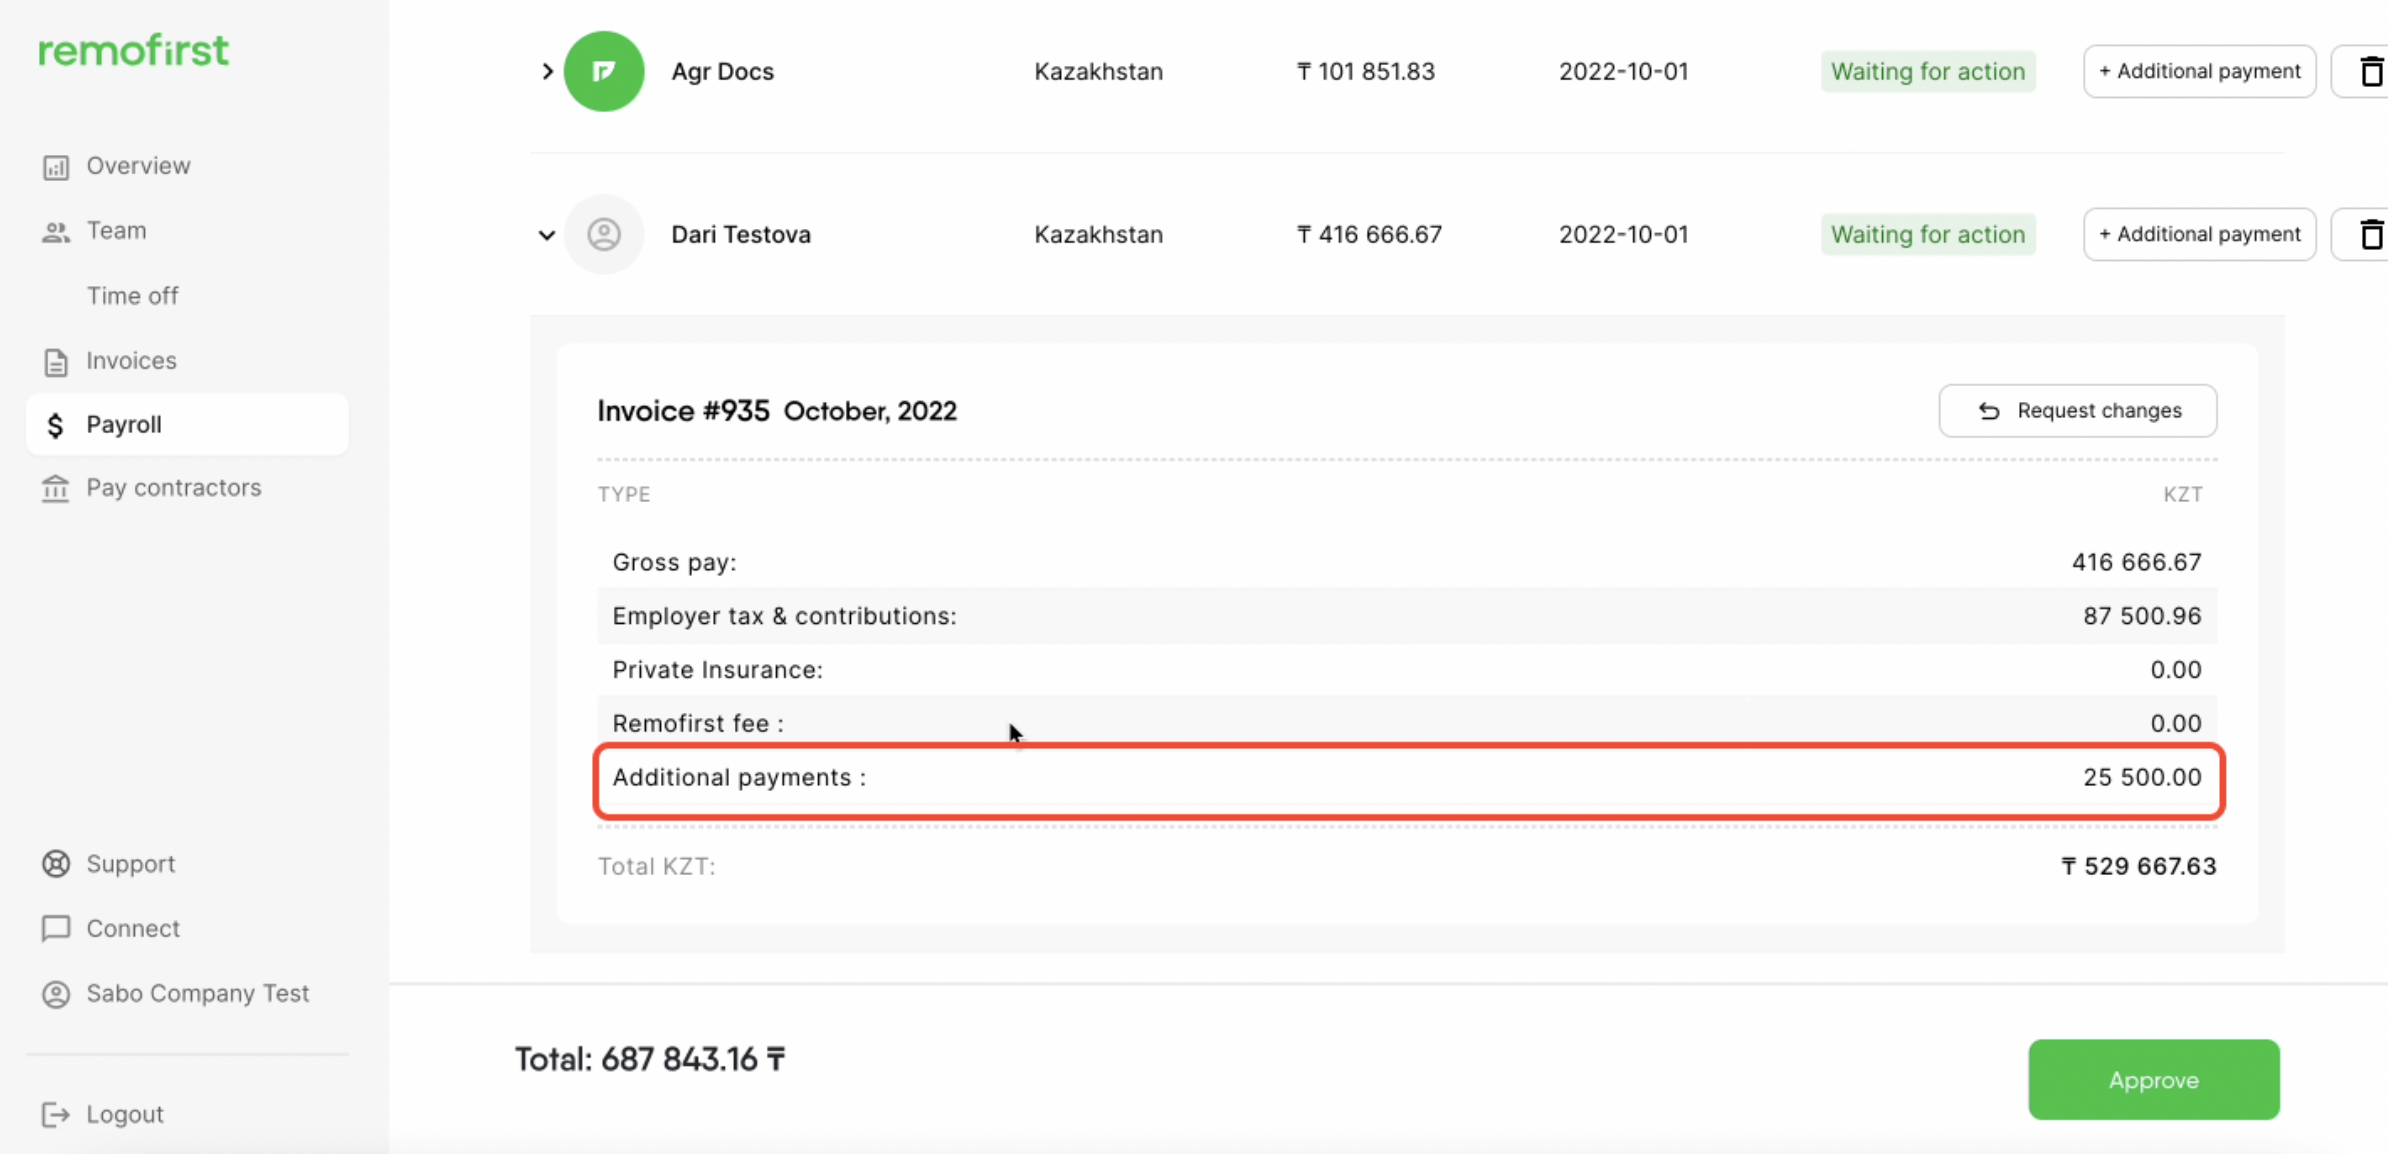
- Once you are on the platform, please navigate to the Payroll tab to review and approve the payroll.

You can find all the calculations for the employees here.
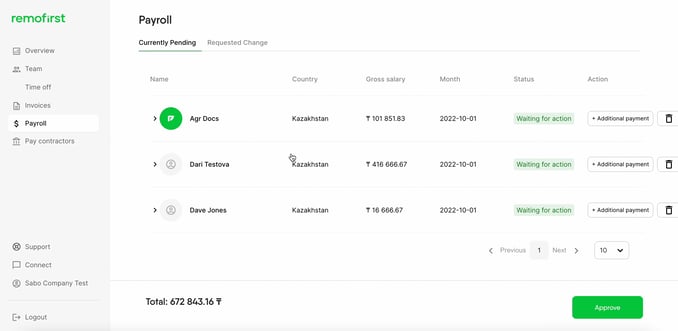
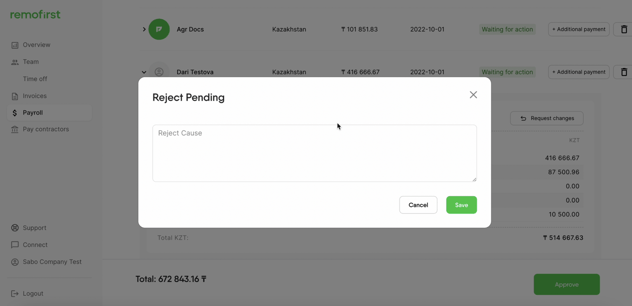
- Select an employee and check the numbers. If something is missing or incorrect, you can select the Request changes button and provide the cause.
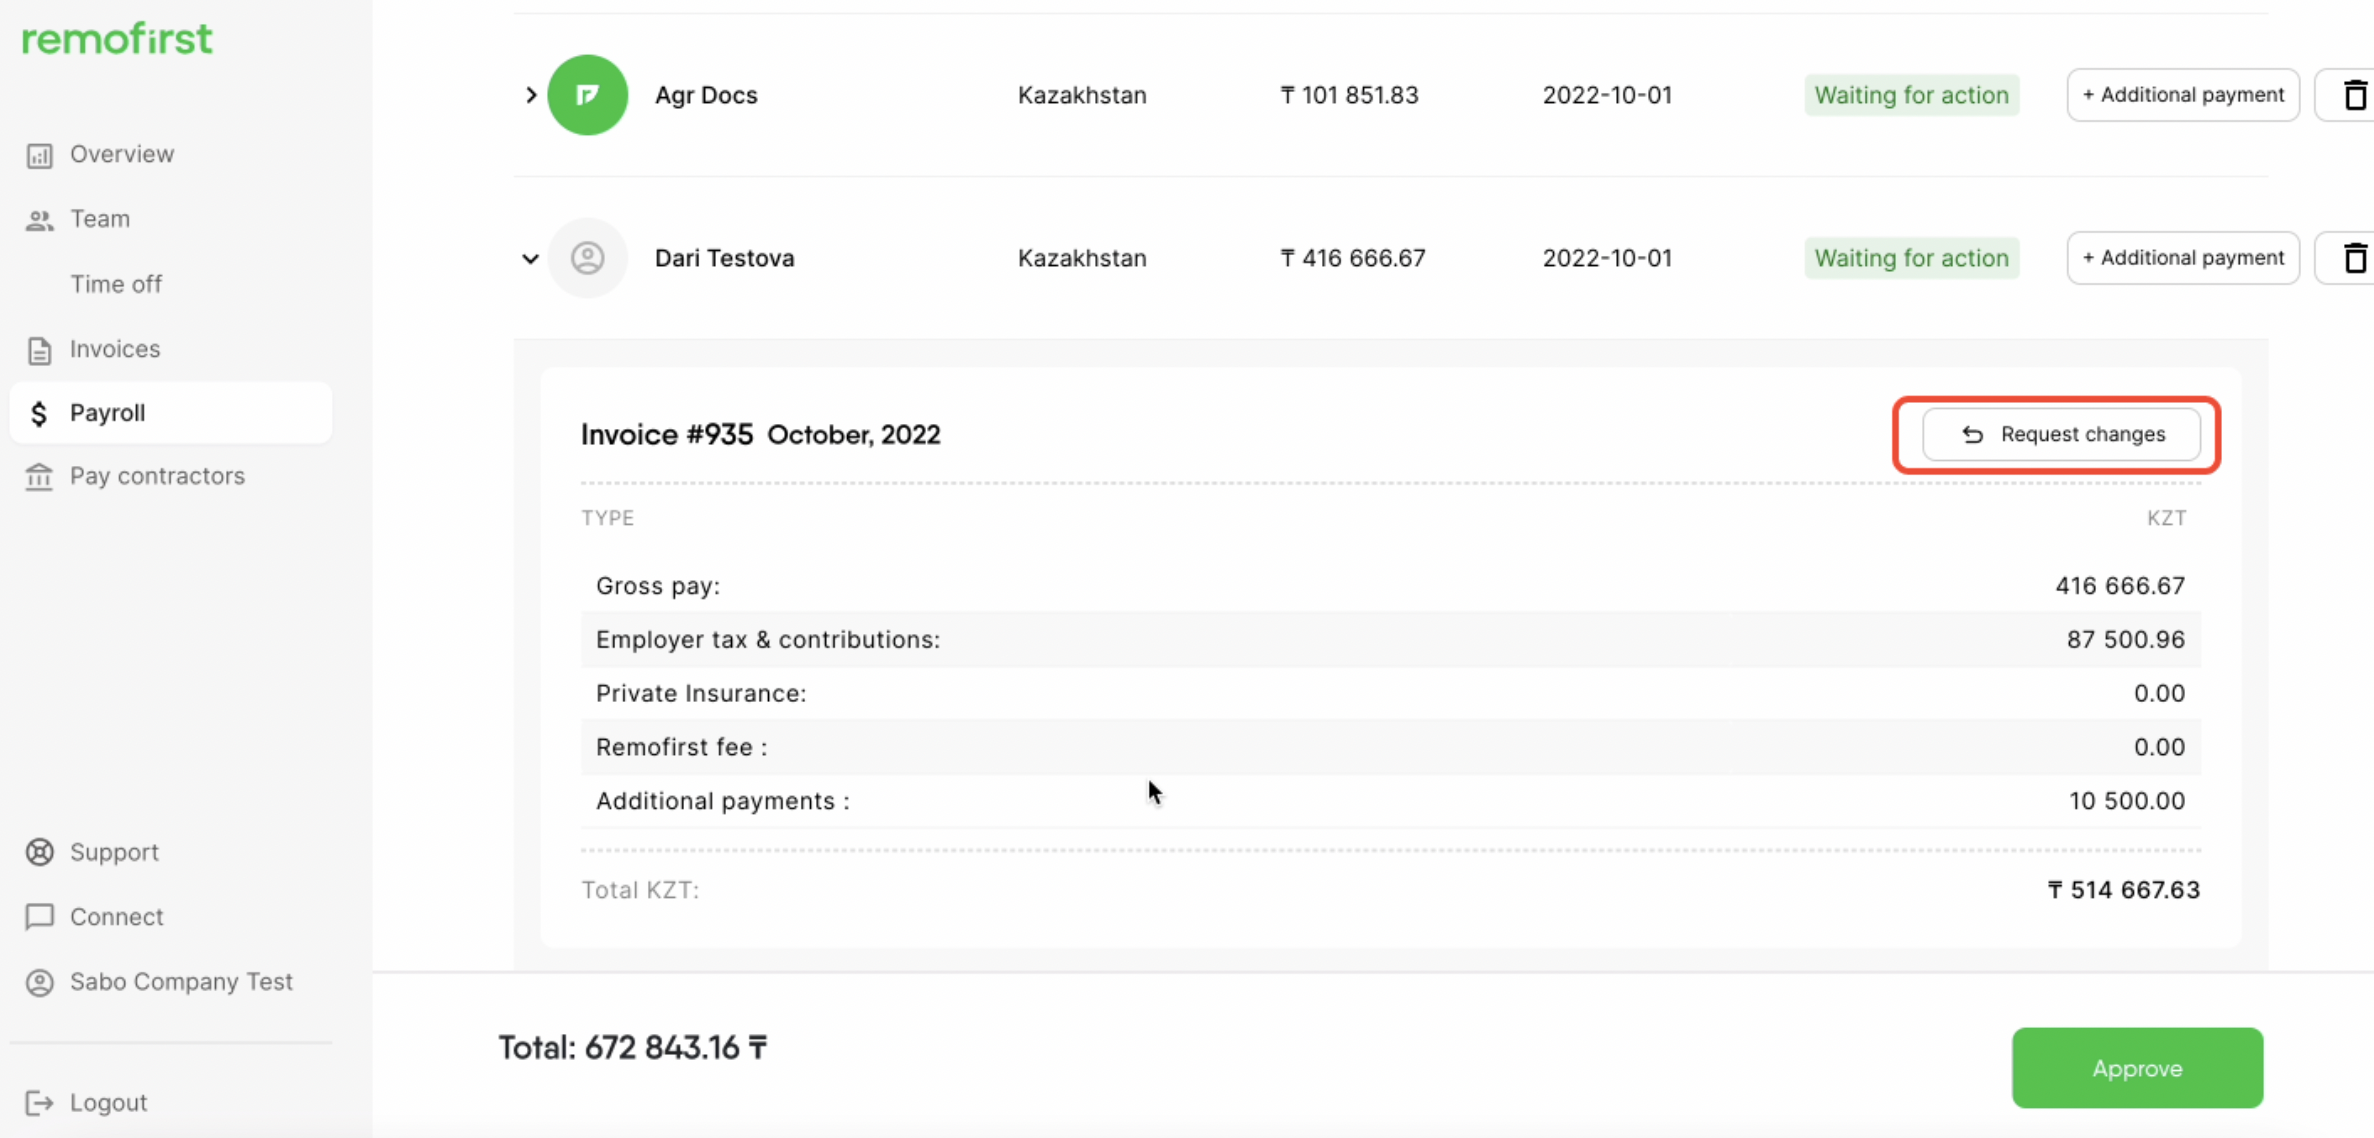
- You can also add additional payments by selecting the Additional payment button.
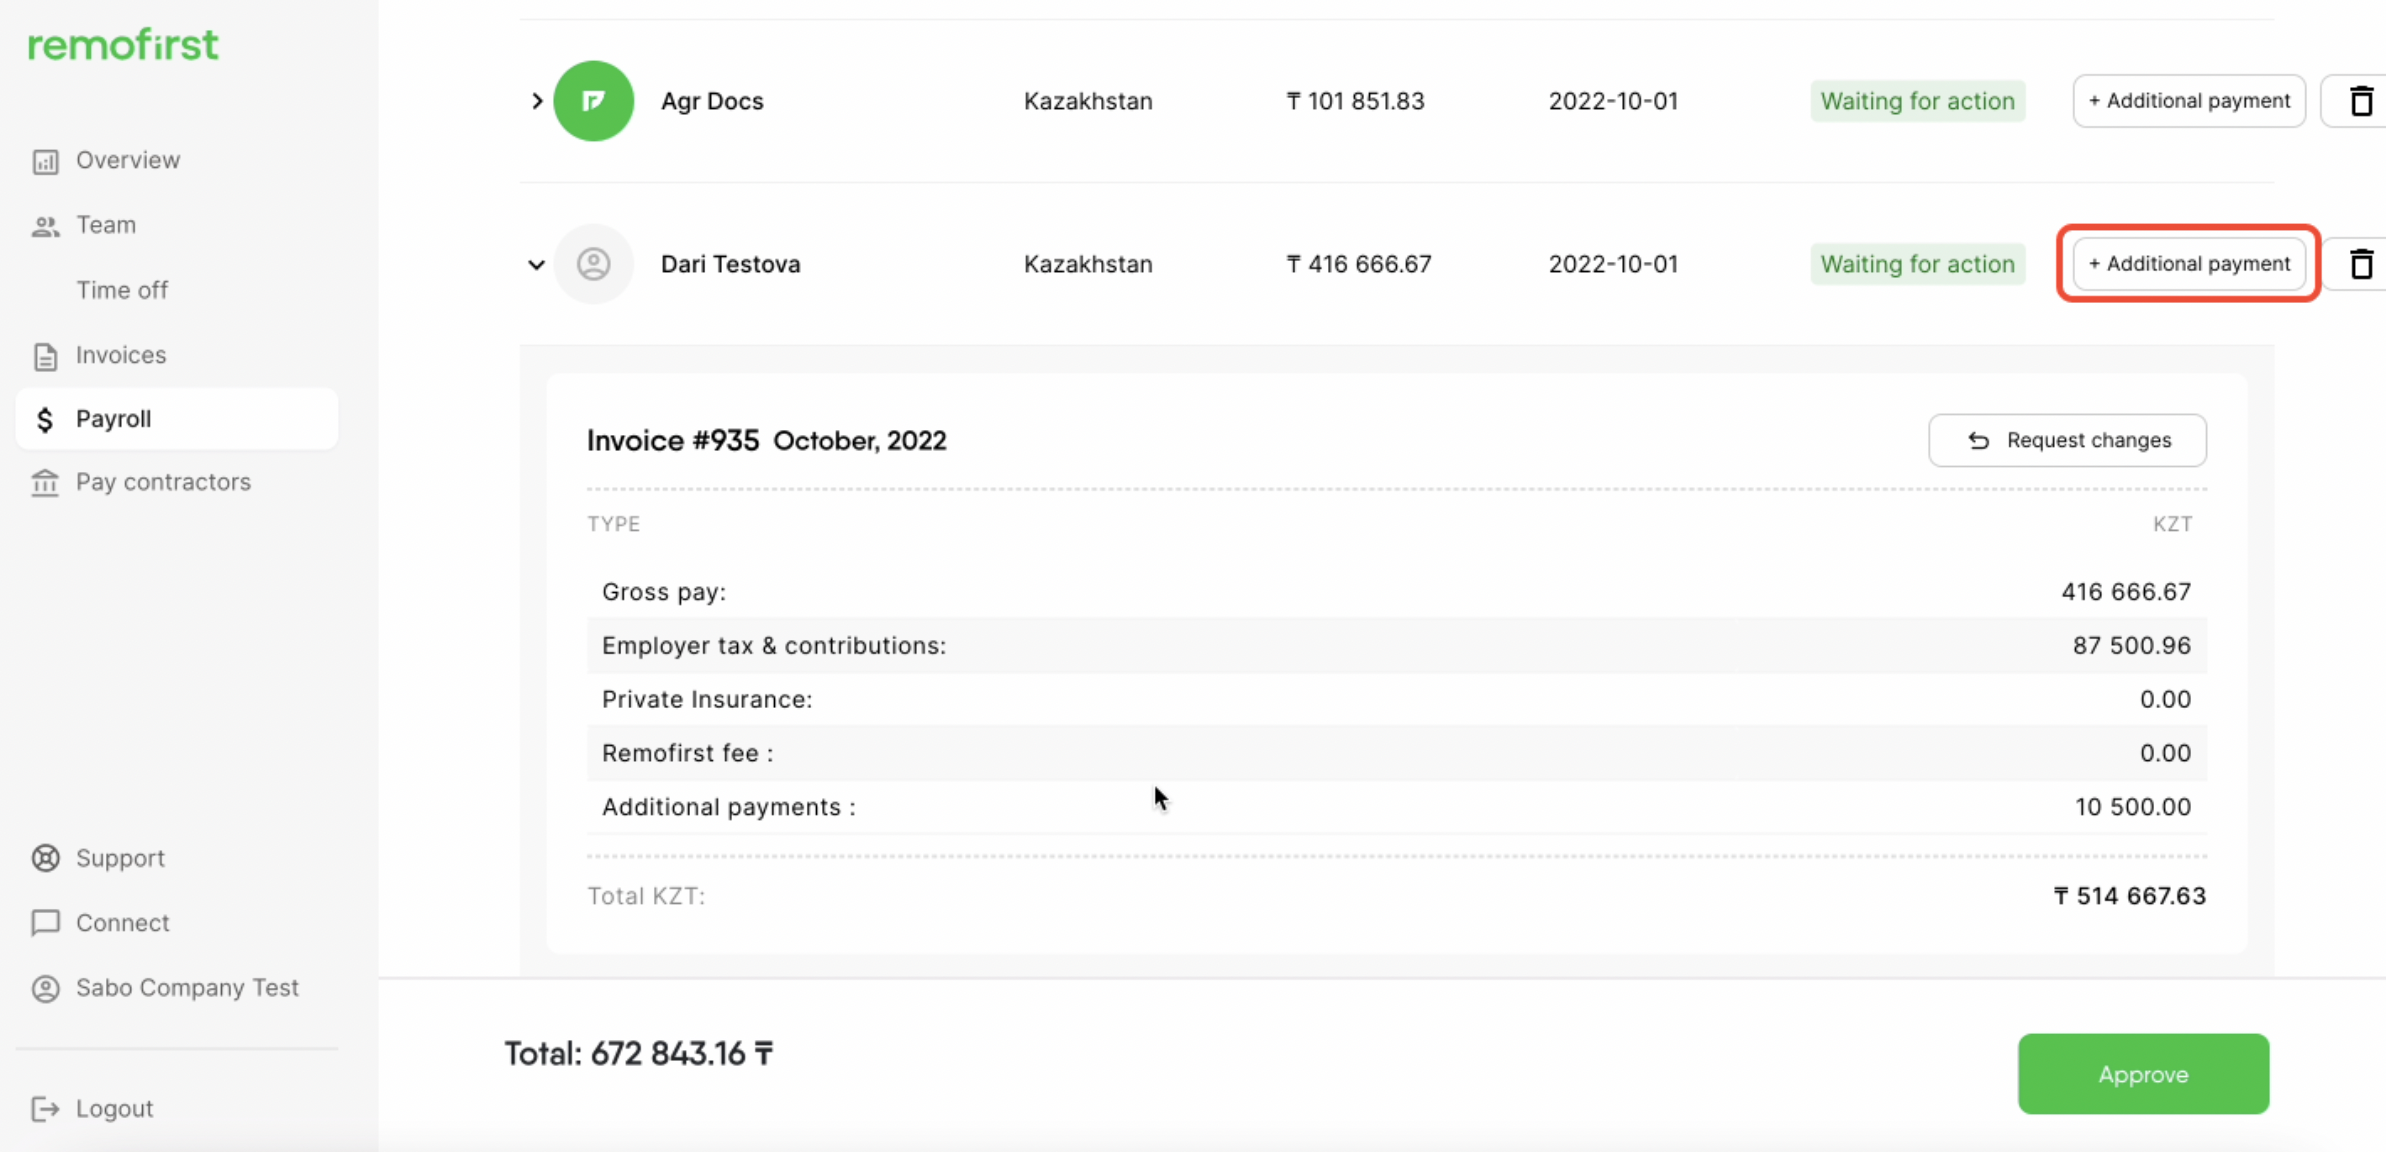
Choose the payment type (bonus, commissions, deductions etc), specify the currency and amount you want to add/subtract and provide the reason name with the notes. Then click the Save button.
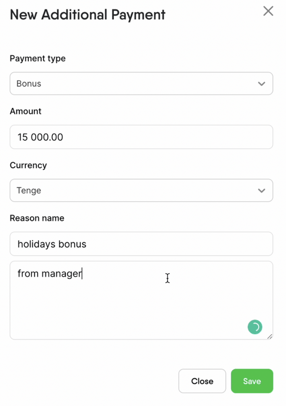
New additional payments will appear on the payroll.
Additional payments must be added before the 3rd working day of the current month.
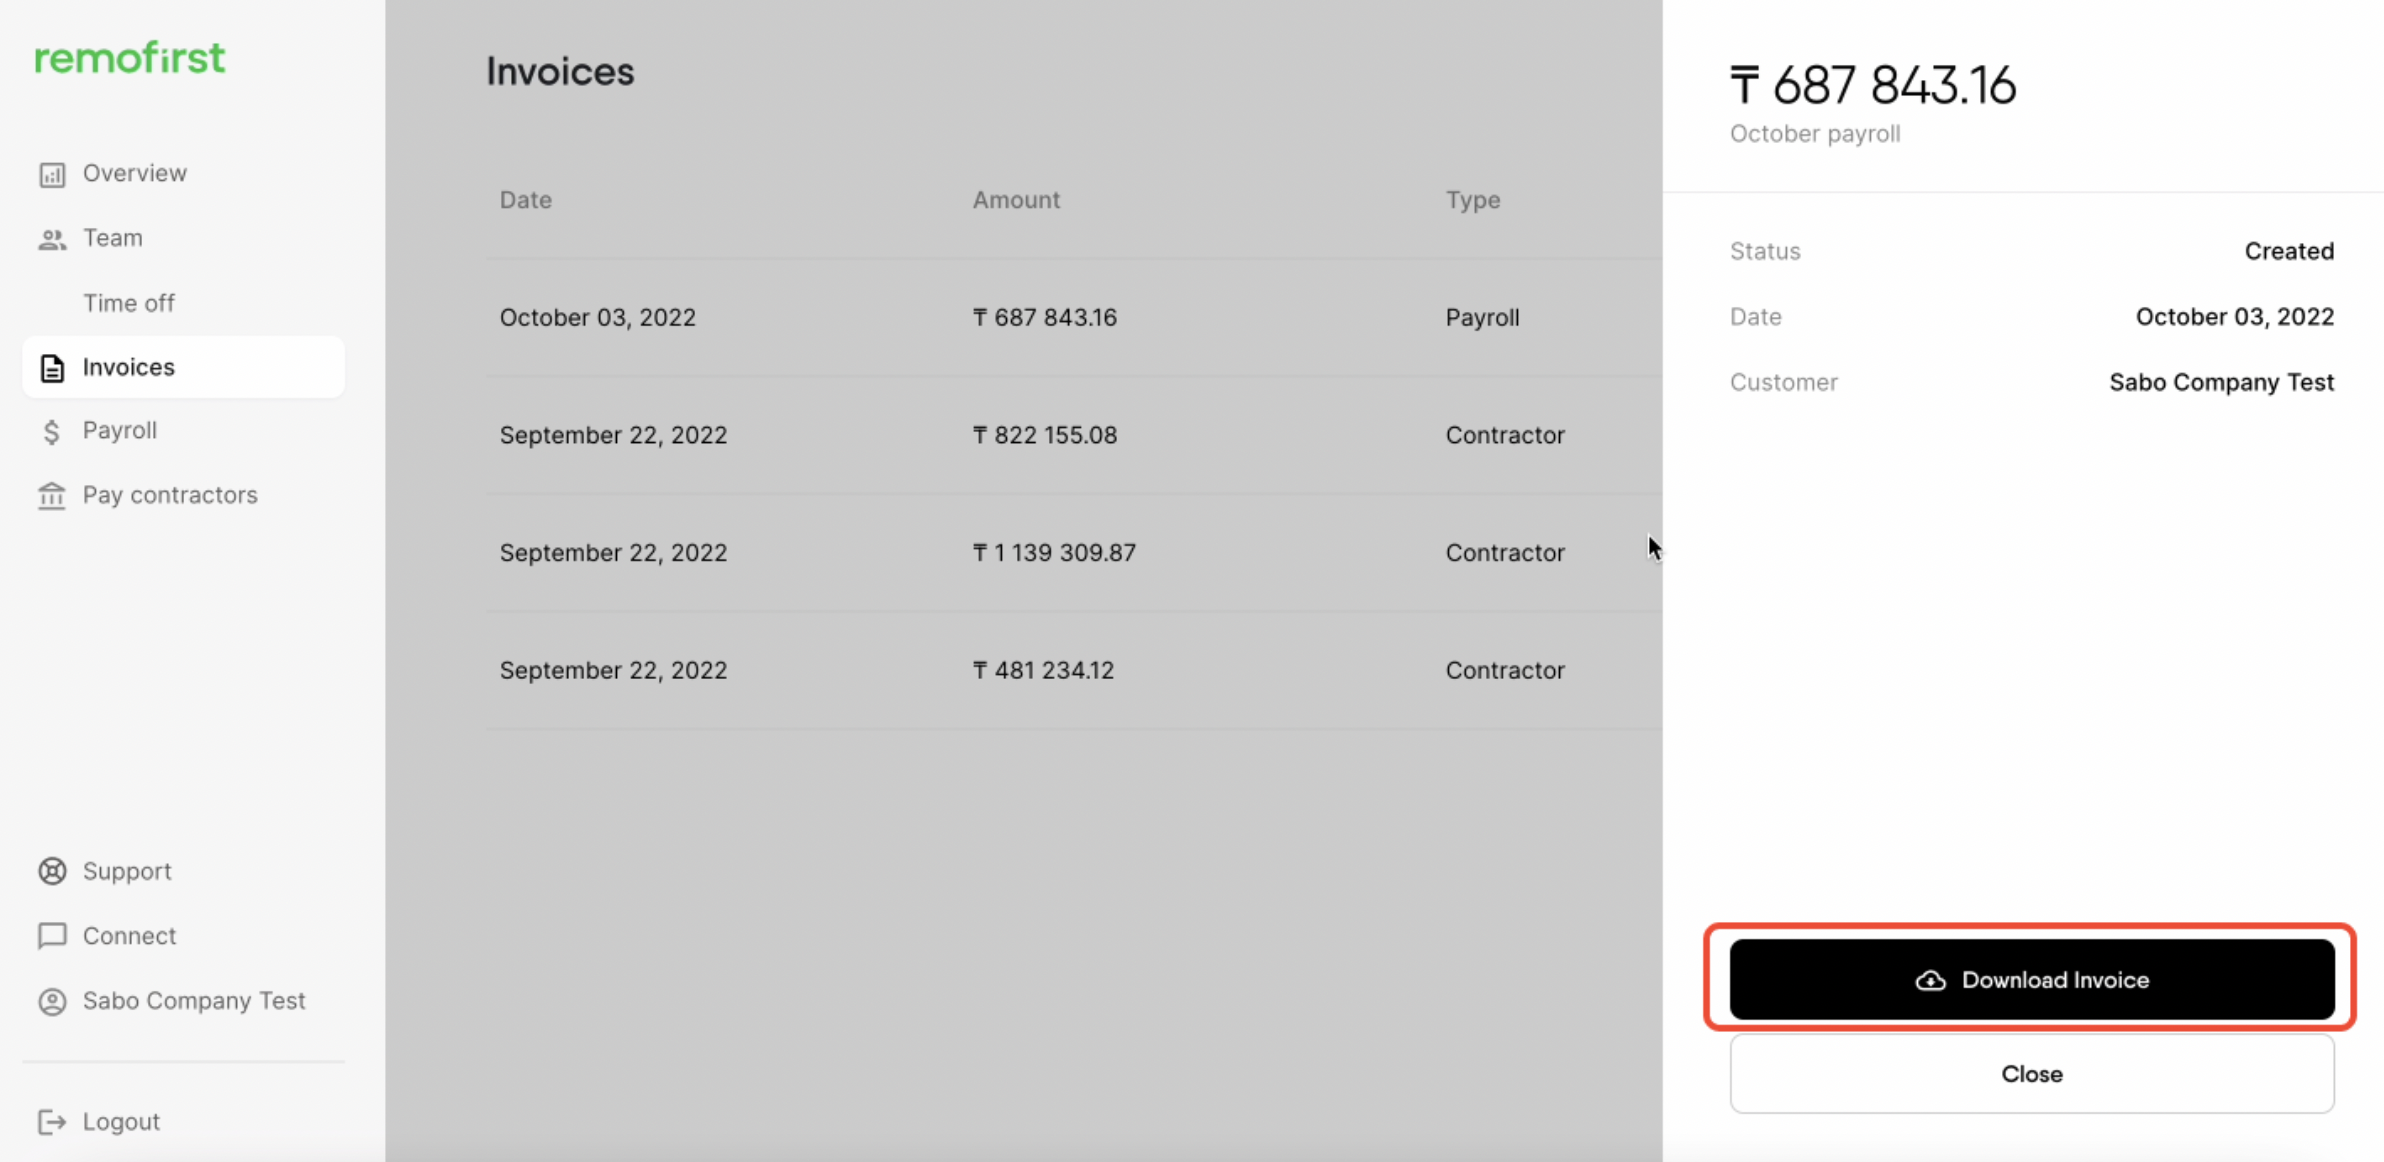
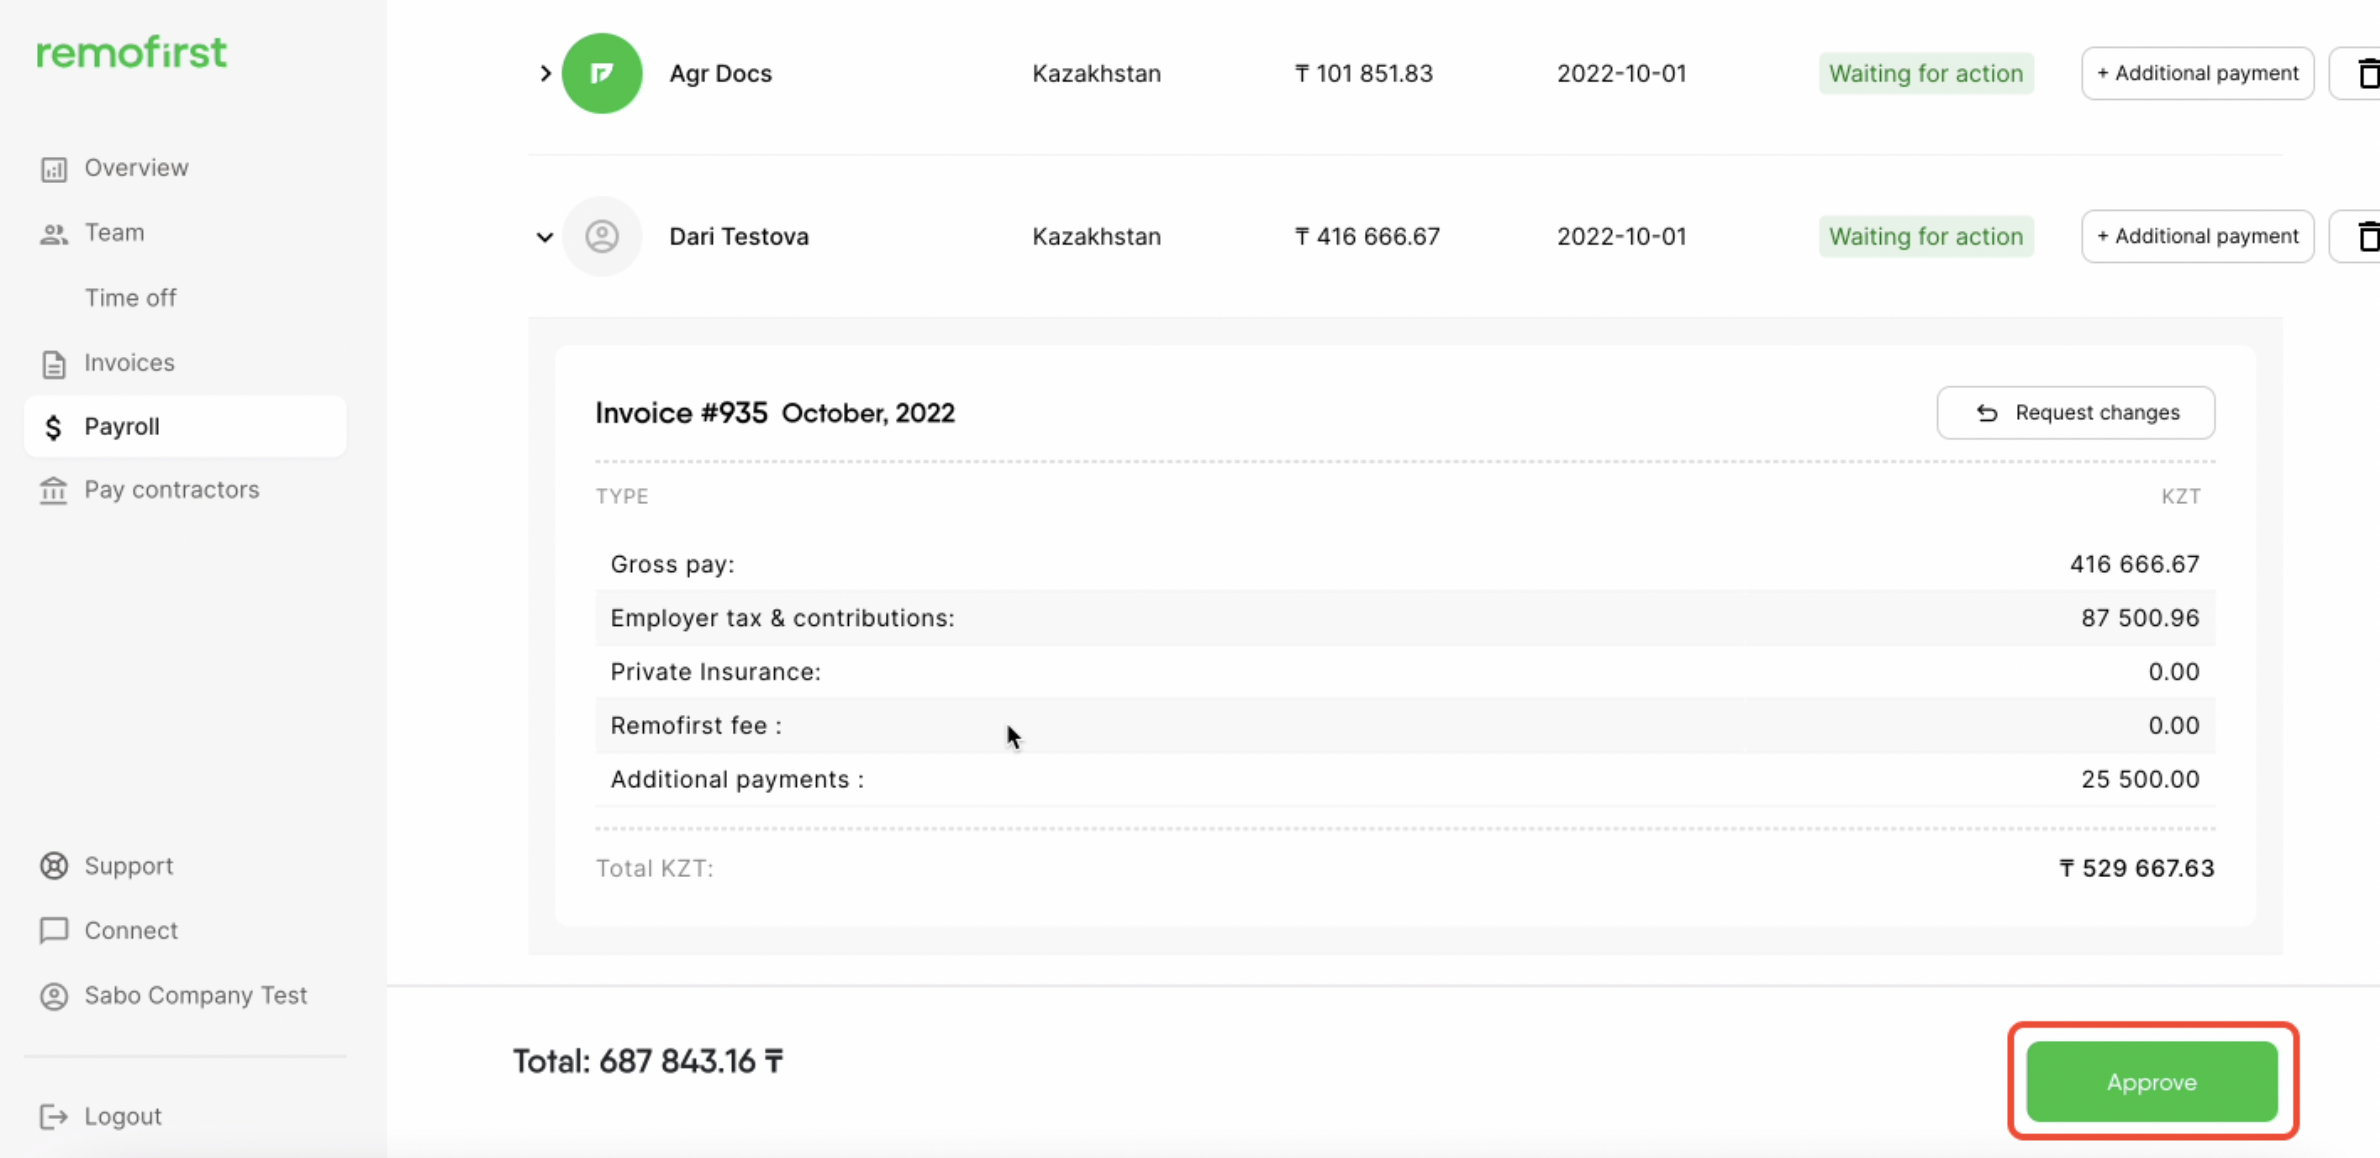
- When you are done reviewing the current payroll, you can select the Approve button below. After that, the invoice will be automatically generated on the platform. You will be able to access it by heading to the Invoices tab.
- You will be able to access it by heading to the Invoices tab.
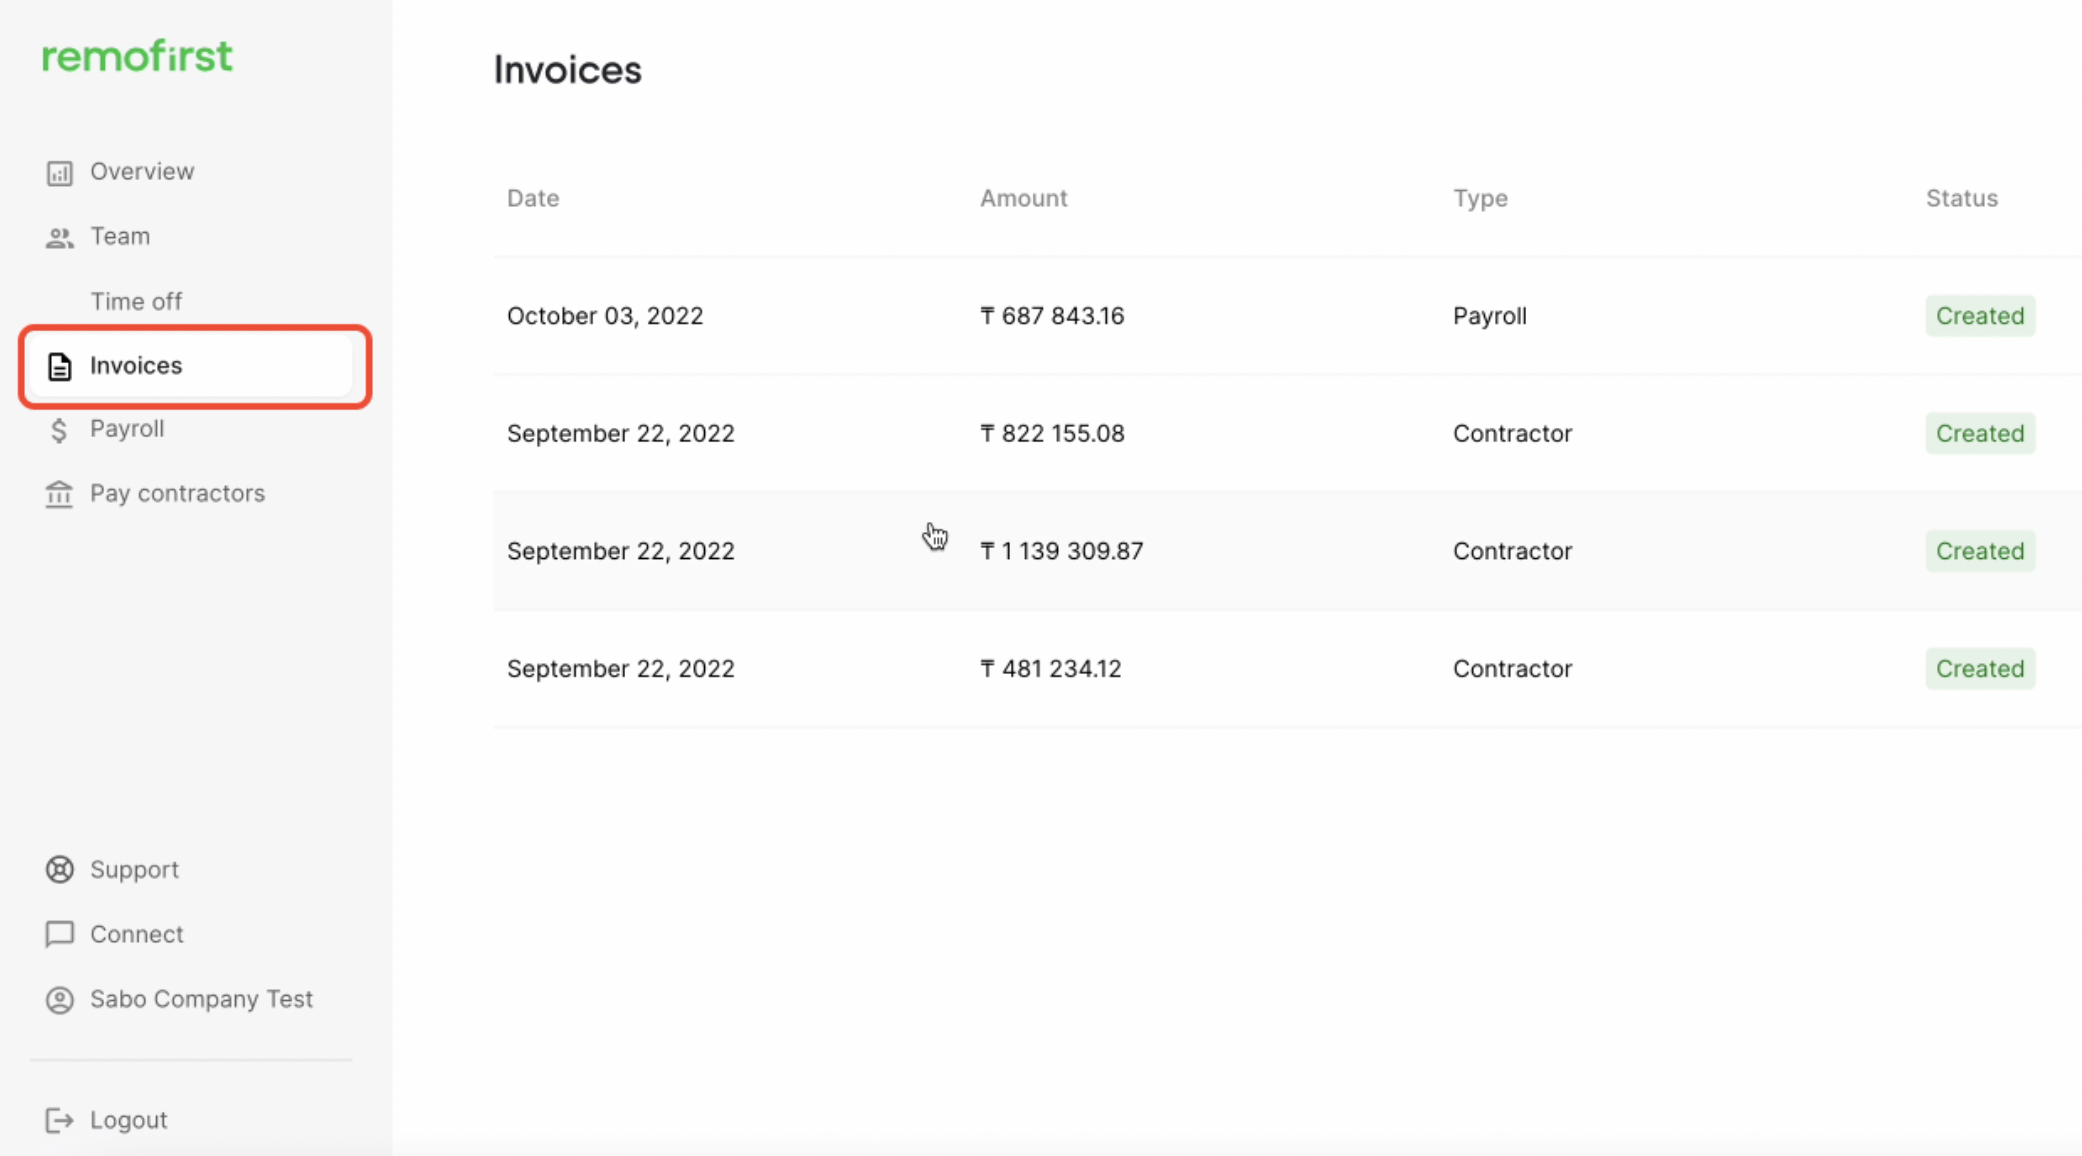
Select an invoice and click the Download Invoice button.